
Making notebooking pages in worksheet format is the process of designing printable, structured pages that combine writing space, visual prompts, and response areas to support student learning. These pages differ from standard lined paper because they include a defined layout: a title area, instructions, and dedicated response zones. Tools like Microsoft Word, Google Docs, PowerPoint, and dedicated platforms like Worksheetwonderpro make this process accessible to teachers, homeschool parents, and church program leaders. Notebooking pages range from minimal lines to fully interactive formats, and the format you choose directly shapes how students engage with content.
What tools do you need to make notebooking pages worksheet format?
The right tool determines how much layout control you have and how quickly you can produce print-ready pages. Three categories of tools cover most needs for educators and homeschool families.
Word processors like Microsoft Word and Google Docs are the most accessible starting point. Both support text boxes, image insertion, table grids for layout, and PDF export for printing. Google Docs is free and shareable, making it practical for church program leaders who collaborate remotely.

Presentation software like PowerPoint or Google Slides offers more visual layout flexibility. Each slide becomes one notebooking page, and you can drag and drop text boxes, clipart, and drawing areas freely. This is the preferred approach when you want decorative borders or themed visuals without learning graphic design software.
Dedicated worksheet platforms like Worksheetwonderpro provide pre-built notebooking page templates and customization tools designed specifically for educators. These platforms reduce setup time and handle formatting details like consistent margins and font pairing automatically.
The table below summarizes each tool category by key features and best use cases.
| Tool | Layout flexibility | Best for | Export format |
|---|---|---|---|
| Microsoft Word / Google Docs | Moderate | Text-heavy pages, quick drafts | PDF, DOCX |
| PowerPoint / Google Slides | High | Visual and themed layouts | PDF, PNG |
| Worksheetwonderpro | High | Ready-made templates, fast output | |
| Canva (free tier) | High | Decorative, graphic-rich pages | PDF, PNG |
Pro Tip: Save your final notebooking page as a PDF before printing. PDF format locks fonts, spacing, and image positions so the printed version matches your screen exactly.
How to structure notebooking pages for readability and engagement
Effective worksheet design uses a clear labeled sequence: title at the top, instructions below it, then the response area. This hierarchy tells students exactly where to look and what to do without requiring teacher explanation every time.
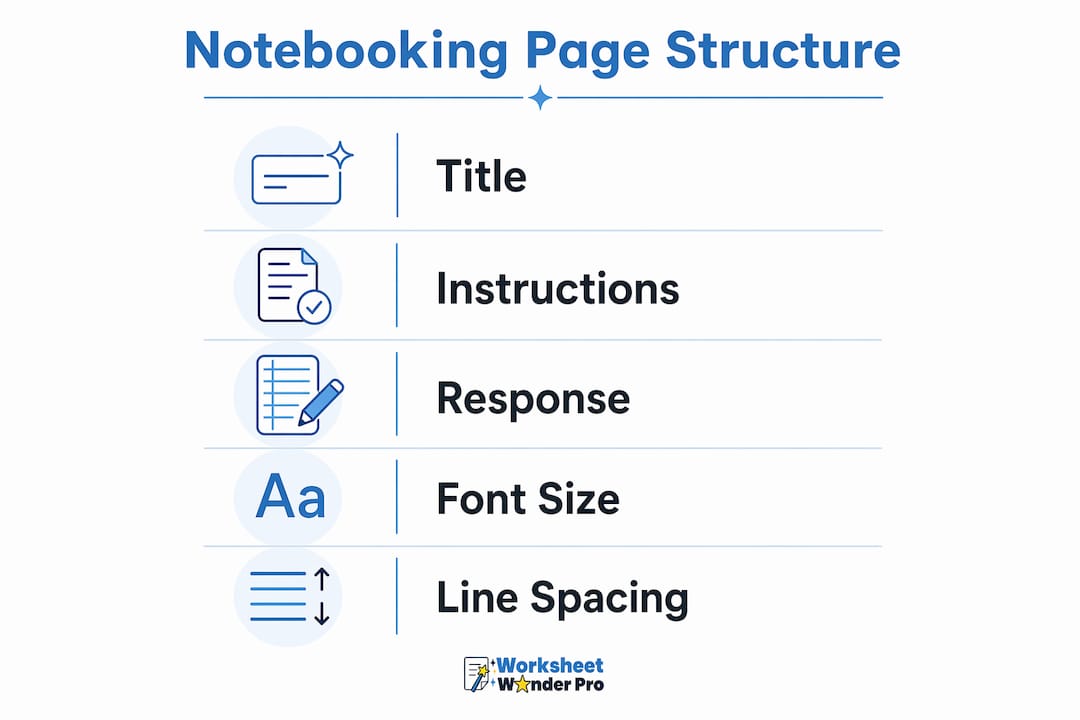
Font size and line spacing matter more than most designers expect. Line height of at least 1.5 times the font size prevents lines from blurring together on printed pages, which is especially important for younger writers still developing handwriting control. A 12pt font with 18pt line spacing is a reliable baseline for grades 3 and up.
Graphic organizers added to notebooking pages significantly increase student engagement. A study measuring reading engagement found a mean post-test engagement difference of 26.1 when visual scaffolds were used, with a large effect size. This means a simple Venn diagram, T-chart, or labeled diagram box on your notebooking page does measurable work.
A design essentials checklist for every notebooking page:
- Clear title at the top in a larger font (14pt minimum)
- Instructions written with action verbs: "draw," "write," "label," "circle"
- Dedicated response area with enough vertical space for student handwriting
- Consistent font family throughout (no more than two fonts per page)
- Soft background color or white space to reduce visual noise
Pro Tip: Test your page by printing one copy and writing in it yourself with a standard pencil. If your hand feels cramped, the response area needs more space.
How to customize notebooking worksheet formats for different age groups
Notebooking pages work best when writing demands are scaffolded by age, starting with drawing space and progressing to sentence writing over time. A single template rarely serves a five-year-old and a twelve-year-old equally well.
Follow these steps to customize your notebooking worksheet format by learner level:
- Identify the learner's grade band. Group your audience into early elementary (K-2), upper elementary (3-5), middle school (6-8), or high school (9-12).
- Set the writing demand. For K-2, allocate 60% of the page to drawing space and limit writing to one or two lines. For grades 3-5, use a 50/50 split between visuals and writing lines. For middle school and up, shift to 70% writing with prompts for analysis or reflection.
- Adjust instruction complexity. Use single-step instructions with picture cues for younger students. Use multi-step instructions with bold keywords for older students.
- Match the subject format. Science notebooking pages benefit from observation boxes and labeled diagram areas. History pages work well with timelines and cause-and-effect columns. Language arts pages need space for vocabulary definitions and sentence construction.
- Increase reflection depth gradually. High school notebooking pages can include prompts like "How does this connect to what you already know?" or "What questions do you still have?" These prompts build metacognitive habits without requiring a full essay format.
For church program leaders, this same scaffolding applies to Bible study notebooking pages. A page for a five-year-old might show a Bible verse with a drawing box below it. A page for a teenager might include the verse, a reflection prompt, and space for a personal application note.
Step-by-step process for creating printable notebooking pages
A reusable worksheet hierarchy follows this sequence: title, instructions, example activity, response space, and closing note. Building your notebooking page around this structure saves time across subjects because the format stays consistent while only the content changes.
Follow these steps to create your own printable notebooking page:
- Define the learning objective first. Write one sentence stating what the student will know or do after completing the page. Every design decision follows from this.
- Choose your tool. Select Word, Google Docs, PowerPoint, or Worksheetwonderpro based on how much visual customization you need.
- Set page margins and size. Use 0.5-inch margins on all sides for an 8.5 x 11-inch page. This maximizes usable space without crowding the edges.
- Build the layout in sections. Place the title block first, then the instruction block, then the response area. Use text boxes or table cells to keep sections from shifting when you edit.
- Add visual elements. Insert a clipart image, border, or graphic organizer relevant to the topic. Keep decoration minimal so it supports rather than competes with the content.
- Test print one copy. Write in the response area by hand to check line spacing and available space. Adjust before distributing.
- Export as PDF. Save the final version as a PDF to lock formatting for printing or digital distribution.
Adding a motivating element like a small challenge, a themed border, or a "Did you know?" box increases student participation without requiring full gamification. A nature-themed border on a science notebooking page costs nothing to add and signals to students that the page was made with their interests in mind.
Pro Tip: Build a master template file with your standard layout and save it as a separate document. Duplicate it for each new topic instead of rebuilding from scratch every time.
For more on digital and printable formats, Worksheetwonderpro covers the technical steps in detail.
Common mistakes when making notebooking page worksheet formats
Most notebooking page problems fall into a short list of repeatable errors. Recognizing them early saves revision time.
- Too much text on one page. Overcrowding forces students to read before they can respond, which increases cognitive load and reduces completion rates.
- Insufficient writing space. Students avoid pages that make writing physically uncomfortable due to tight line density. Always test with real handwriting before finalizing.
- Visual overload. Excess decoration competes with content and confuses learners. Clip art and borders should frame the page, not fill it.
- Age-inappropriate language. Instructions written for adults confuse younger students. Use action verbs and simple wording like "draw," "write," and "circle" for grades K-5.
- Skipping the test print. A page that looks clean on screen can have misaligned text boxes or cut-off margins when printed. Always print one copy before distributing.
- No revision cycle. Ask students or co-teachers for feedback after the first use. One round of revision based on real use improves the page more than any design theory.
For a deeper look at common design mistakes, the Worksheetwonderpro blog covers the most frequent layout errors and how to correct them.
Key takeaways
Effective notebooking pages require a clear layout hierarchy, age-appropriate writing demands, and a test print before distribution.
| Point | Details |
|---|---|
| Start with the objective | Define what students will learn before choosing any design element. |
| Use a consistent layout hierarchy | Title, instructions, and response area in that order reduces student confusion. |
| Scaffold by age | Younger learners need more drawing space; older learners need more writing and reflection prompts. |
| Test print every page | Writing in the page by hand reveals spacing problems that screen previews miss. |
| Limit decoration | Visual clutter competes with content and reduces worksheet usability. |
What I have learned from designing notebooking pages
I have reviewed and tested notebooking page designs across homeschool co-ops, classroom settings, and church education programs. The pattern that stands out most is this: the pages students return to are not the prettiest ones. They are the ones with enough space to write comfortably and instructions clear enough to follow without asking for help.
Structure and creativity are not opposites in notebooking design. A well-structured page actually gives students more freedom because they know exactly where to put their ideas. The blank-page anxiety that stops some students disappears when the format does its job.
One observation from church education settings specifically: notebooking pages with a single reflection prompt and a drawing box consistently produce more engagement than pages with five fill-in-the-blank questions. Less structure in the response area, when paired with a clear prompt, produces more original thinking.
The best advice for anyone starting out is to design one page, use it with real students, and revise it once before building a full set. Iteration based on actual use beats planning in isolation every time.
— Pamela
Create custom notebooking pages with Worksheetwonderpro
Worksheetwonderpro is a worksheet creation platform built for teachers, homeschool families, and ministry leaders. It provides customizable notebooking page templates, layout tools, and PDF export in one place.
The platform includes pre-built template structures that follow the title-instructions-response hierarchy described in this article. Users can adjust font size, add graphic organizer sections, and set line spacing without working in a general-purpose word processor. Free resources are available at the featured resources page for educators who want to start without a subscription. For full template access and custom notebooking page creation, visit Worksheetwonderpro to explore available plans.
FAQ
What is a notebooking page in worksheet format?
A notebooking page in worksheet format is a printable page that combines a title, instructions, and a structured response area for student writing or drawing. It differs from a blank journal page by providing a defined layout that guides student responses.
What software is best for creating notebooking pages?
Microsoft Word, Google Docs, PowerPoint, and dedicated platforms like Worksheetwonderpro all work well. Dedicated worksheet platforms reduce setup time and handle formatting details automatically.
How much writing space should a notebooking page have?
Writing space depends on the learner's age. For grades K-2, allocate at least 60% of the page to drawing or tracing space. For grades 6 and up, writing lines can occupy 70% of the page with reflection prompts included.
How do graphic organizers improve notebooking pages?
Graphic organizers increase reading engagement by supporting behavioral, cognitive, and emotional involvement in learning tasks. Adding a simple T-chart or Venn diagram to a notebooking page produces measurable gains in student participation.
How do I avoid common notebooking page design mistakes?
Test print every page and write in it by hand before distributing it. Keep decoration minimal, use action verbs in instructions, and always define the learning objective before starting the layout.